How to use VSCO
Visual Supply
VSCO started out as a powerful set of film simulation presets for
Adobe Lightroom, and became popular seemingly overnight: all kinds of
photographers have adopted these Lightroom presets to bring vintage
styles to the digital era.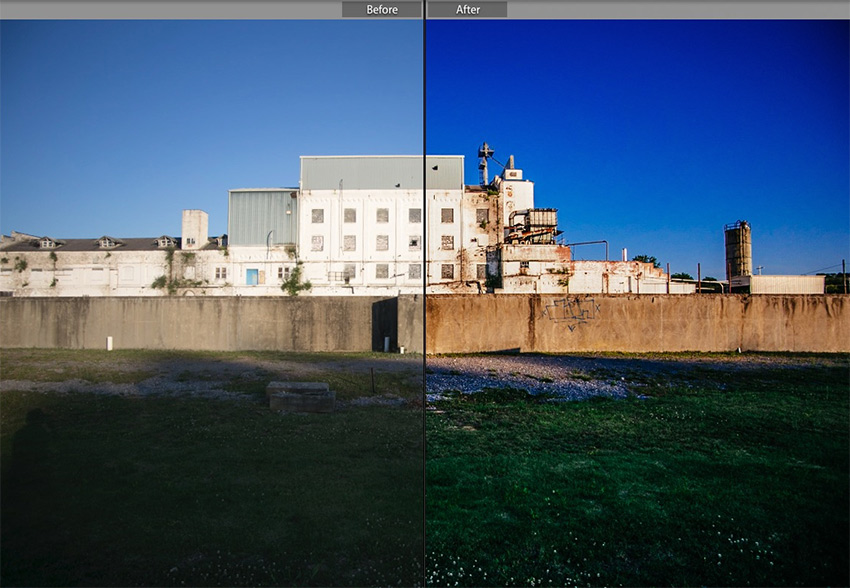
As far as mobile apps go, VSCO has it all: a great camera, sophisticated filters and editing options, and social features that allow you to instantly publish your images online. It's no wonder it frequently tops the Photo sections of the mobile app stores. Let's look at how to use it.
For New VSCO Users
VSCO is a free app available for iOS on the App Store and the Google Play Store. It's also important to note that people sometimes confuse the mobile VSCO app, with the VSCO Lightroom presets. Both are made by a company called VSCO and create film-style edits, but are different products.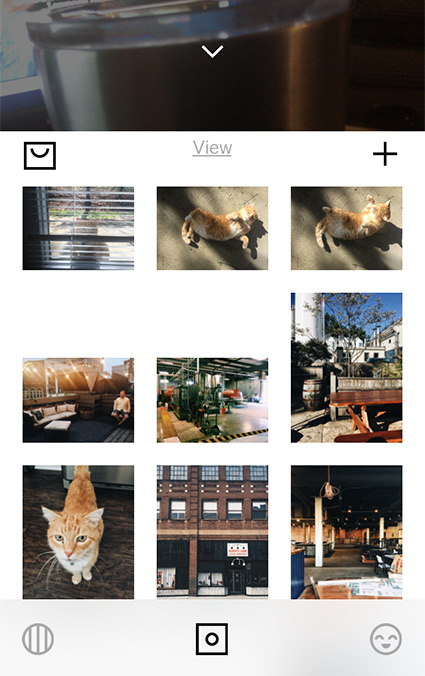
Note: This tutorial's screenshots were generated in VSCO for iOS. The Android version works more or less the same.
Capture Images with VSCO
To capture images from within VSCO, tap the Studio icon at the bottom of the app. Then, swipe down, pulling down to switch to the camera mode.
- Just for fun, VSCO has a facial sticker overlay that tracks and overlays a cartoon style facial expression.
- You can toggle on RAW image capture to natively capture images just like your DSLR would.
- Toggles through the grid overlays and crop modes.
- Cycle through flash options, including a continuous light option.
- Switch from the rear-facing to front-facing camera.
Import Images to VSCO
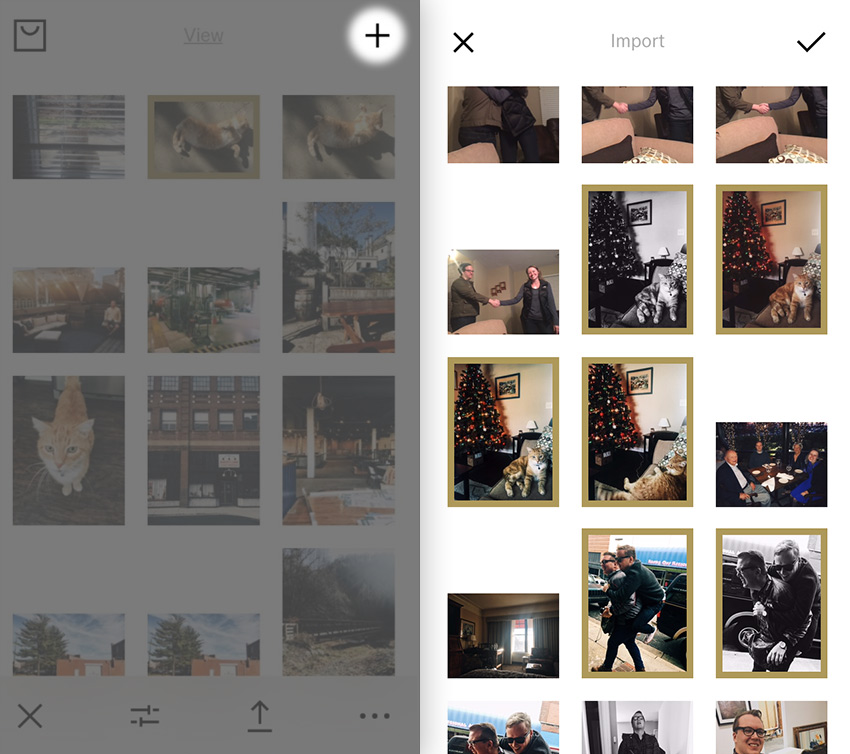
If you're using VSCO both as a camera and as an image editor, the photos you take will automatically be in your VSCO image feed.If you use another app to capture images, you can import them later into VSCO as well. Importing them to VSCO creates a copy. To import images into VSCO, make sure that you're working in the studio and press the + button near the upper right corner.
VSCO doesn't automatically delete images from your camera roll. Once you've imported your images into VSCO, it creates a copy contained solely within the app. You'll need to export it for the changes to take effect.
Now, let's get to the strength of the app: creative image styling.
Use VSCO's Image Presets
The quickest way to style an image in VSCO is to apply one of the built in presets.To apply a filter to an image, double tap on an image to open it. At the bottom of the app, you'll see small thumbnails. To try out a preset, just tap one of these to apply to an image.


Fading Presets
VSCO has some great looking presets, but you might want to dial them back to apply them subtly.To fade a preset, start by tapping on the thumbnail for the preset. Pull the slider to the left to fade the preset slightly. Then, press the checkmark to save your changes.

Also try out applying multiple presets to an image. Fade one preset, then save your edit and apply another.
Image Corrections
In addition to presets, VSCO offers the standard suite of correction tools, such as exposure, contrast, and sharpening. However, these tools are tailored for stylistic image edits.To launch the correction tools, select an image from Studio view. Tap the slider icon just like you did when we entered the presets menu. Then, press the small arrow at the bottom of the screen, and press the sliders icon from this menu.

Here's a key to the tools in VSCO:

-
Exposure: adjust the overall brightness of an image
- Contrast: reduce or increase the contrast between light and dark portions of an image.
- Straighten: correct tilt.
-
Horizontal Perspective: correct for perspective, left to right.
-
Vertical Perspective: great for correcting an image when you've pointed your camera sharply up or down.
- Cropping: adjust the composition of an image in post.
- Clarity: brings additional definition to the edges of an image.
- Sharpening: add additional detail to an image.
- Saturation: adjust the intensity of an image's colors.
- Highlights Save: pull back the brightest parts of an image, adjusting whites to light gray.
- Shadows Save: pull the darkest parts of images brighter, pulling the black point into a dark gray.
- Temperature: adjust white balance.
-
Tint: apply a green to violet type correction to an image.
-
Skin tone: targeted adjustments for correcting skin tone.
-
Vignette: darken the edges of an image.
-
Grain: add a bit of film-style coarseness to an image.
- Fade: shift the black point of an image to add an old-school style look.
-
Shadows Tint: add a colored tint to the dark parts of an image.
- Highlights Tint: add a colored tint to the brightest parts of an image.
Fade
Fading an image gives it that beautiful aged image look. The fade look is similar to tone curve adjustments applied in apps like Adobe Lightroom. A slider from 0 to 12 adjusts the amount of fade to apply to an image. Broadly speaking, fade works by lifting the shadows and dropping the highlights (slightly) to create a low-contrast look. This can help hide some of the most characteristic flaws of smartphone cameras.
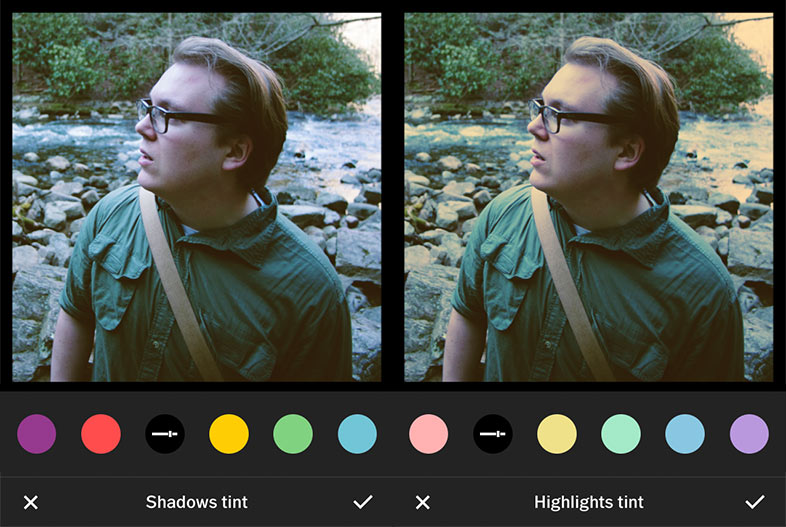
Highlights & Shadows Tint
Film is often preferred for its unique color renditions. Every film has that signature style for rendering color.Two of my favorite tools in VSCO are the shadows tint and highlight tint options. Tap these options and choose a color to bring some tinting to the bright or dark parts of an image.
Bonus: tap a second time on an individual color to adjust how much tinting is applied.
Grain
These days, the high ISO capabilities of modern digital cameras have reduced much of the grain seen in images. Even then, the digital grain is different from the grain seen in the film era.VSCO has a great option for making grain look more random and film-like. Pull the slider up until you add a desired amount of coarseness to your images.


I have tried this VSCO app already and the camera effects are totally awesome.
ReplyDeleteVSCO is good.
ReplyDeleteThanks for the knowledge. YEHEY
ReplyDeleteVSCO is one of my favorite app because filters are not overrated. It just seems so natural.
ReplyDelete